This is what the Google Map in the course page looks like:
 |
| Google Maps in a Moodle course page 'label' resource with custom locations marked with blue markers |
How to do this:
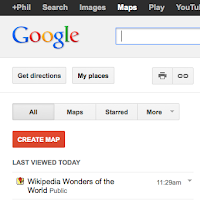
- Login to Google (with your Google account)
- Go to http://maps.google.co.uk/
- Click 'My Places'
- Click 'Create' map
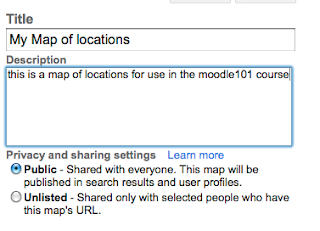
2. Add some locations to your map
- Search Google Maps for some locations, or add your own via placing the blue marker in your location
- Click 'Save to Map' in the marker's balloon information and save to the map you just created
 |
| Search for a location in Google search, or use the blue marker (next to hand icon at top) to select a place. Then click to show balloon and choose 'save to map' |
3. Create some Moodle resources or activities to link in with the locations you have chosen
 |
| 'Page' resource in Moodle with content relating to a location on your map |
4. Link the URLs of your Moodle resources into Google Maps
- Go back to Google Maps > My Places > Your map
- Click 'Edit' and select a location
- Write some text in the box as shown below
- Create a hyperlink using the <link> icon (select 'rich text' for full editor options) and link back to the Moodle resources you have just created (3. above)
- Click 'Save' and 'Done'
 |
| Click into your map and click edit. Then choose a location and write custom notes in the balloon. You can add hyperlinks back to your Moodle resources using the <link> icon |
5. Embed the Map into your Moodle course page
When you have saved all your custom notes and hyperlinks in Google maps (above), you just need to embed the map into your course page for the full navigational effect.
- Click on the <link> icon as below
- Select the text starting <iframe>
- Create a label on the Moodle course page
- Choose <html> button on the editor

- Paste the html in from Google
- Note: You can choose 'Customise and preview..' link to change the view of the final embedded map. Do this before pasting into Moodle
 |
| Click the link icon (next to the printer) and select the bottom piece of code (starting <iframe>) |
That's all!
You now have a map in your Moodle course page which acts as a navigational device to other areas of your course (this could be a 'page' resource as above, or a wiki or discussion for student interaction activities)
 |
| Your notes with hyperlinks appear in the balloons against each of your locations |
Ways to extend this capability
- I have demonstrated above how to link your Google maps into your course page as a navigational aid to 'page' resources. You may want to link these places to a WIKI or FORUM resource, so students have the opportunity to write their own reviews of the places
- You may wish to put the activities that the map links to in a hidden section at the bottom 'as orphaned' so this is the sole navigation to resources and activities on the course page.
- It is possible to 'collaborate' on your maps or make them available for public editing. If you select this option in Google Maps your students may want to add their own places directly into Google, and make notes and links back into their Moodle wiki pages/ forum posts etc. All changes made to the Google Map via Google will show dynamically on the course page
- The Google map you have created will have a link for the 'kml' file. This file will open in Google Earth application and display all your places
- The Google Maps API allows for embedding of Google maps in web pages with custom API queries, so you may be able to write some code which uses further API commands to extend the features of your map. Further info on the Google Maps API can be found here